

Aha! My first quilt! I wanted to make a quilt for E. before her baby sister arrived, just as something special from Mommy that said, "I love you, please cuddle in this soft and perky quilt!"
I'm going to include a lot of process photos, because making a quilt is literally a big deal! If anyone out there needs some help or inspiration, I want to say to you: it's totally achievable, it's fun, and you don't even have to do this "binding" thing! My quilt is turned and topstitched. :)
 |
| You can see the giant piece o' minky under the top in this process photo |
My goal: finish the quilt before the new baby's birth! My mom was visiting and helped me plan things out and calculate this and that. I used this color values quilt tutorial/example (among other internet research) because I just thought it looked so fun! And it WAS fun; SO fun to make, came out AWESOME, and E. LOVES it. She calls it, "Quilty" and has it on her bed.

OK, I don't have a photo of every step of the way, but here's how I did it.

First, with my 6" square ruler and handy rolly knife rotary cutter, I cut out a ton of squares of fun fabrics.

Then, I separated them out into three piles: light, dark and medium. Those already-cut triangles were from some doggy bandannas that were already big triangles.

Oooh, piles!

Then I made pairs of them, one lighter and one darker, and drew a line down the diagonal.

This step is SO COOL. Even though for experienced quilters it's probably a "well, no duh" mental moment, I still think it is COOL! You sew two lines down either side of the pencil line. Because you're going to CUT on the pencil line, making TWO "half triangle squares" from all your hard work on one square!

See? When you cut, it is two! Two of the same thing, of course, so I made sure to place all these twins far away from each other in the quilt. I'm sure you could purposely repeat them in a cool pattern, but I wanted happy random variety.

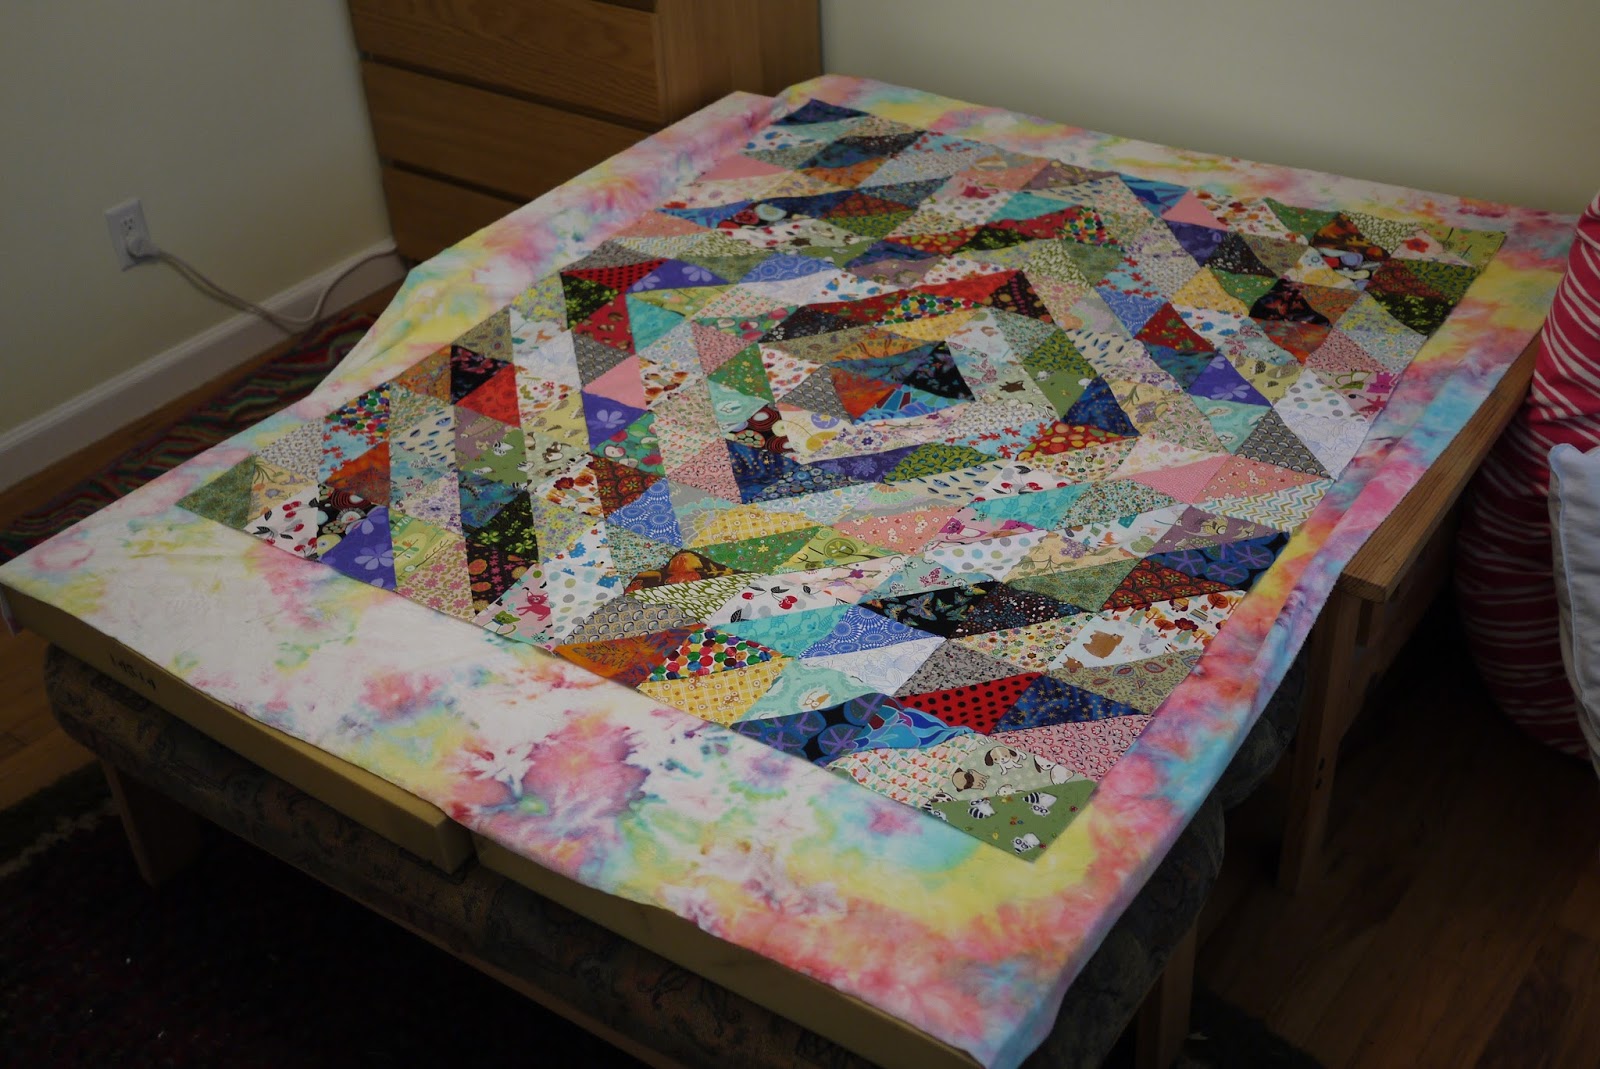
I took a looooong time arranging the squares on the guest bed! One thing about quilts: you need a lot of space to lay them out. We didn't (and still don't) have the luxury of wall space, so beds it is!

Then I sewed on down the line, piecing all the squares into rows, then the rows together. I kept it all sorted with strategic piles and a command for no one to touch the guest bed!

Coming along

Checking it out on the backing, now on my bedroom bed. Plenty of room for my border!

I added a border of KNITS so it would be soft on the edges. I also didn't want the turning and topstitching eating into the sides of my squares along the edge.
Did I mention I was sort of winging it, and leaving a lot of room for error? Because I was. :)

Once the top was all together, I attached the batting to it, first with pins, and then I sewed it. I don't know if this step is neccessary, but I did not want to deal with bunchy batting and the insanity of trying to turn the quilt with mostly loose batting getting all ripped and messed up. I know myself. Things like that just happen to me, so I need extra precautions!

I sewed everything together around the edge, right sides together, and turned it. I felt the need to topstitch the edge right away, to avoid any wonkiness of pushed-out fabric if I started at the center. I probably should have started at the center, because on the back there was some skipping and catchiness. Do you love these official quilting terms, or what? ;)
Then, as seen above, I taped out the continuing lines of "stitching in the ditch" (that really is a quilting term) on all the diagonals. Then I ran that through the ol' machine and I was done!

There it is!
You know, I didn't take many photos of the finished quilt, because as soon as I gave it to E., she was using it, we were washing it over and over, etc. She still loves it now, a year+ later, and I think she always will. Aww! I should add an updated photo of what it looks like now -- much the same, but nice and soft!
Now I need to make a big quilt for little sister sometime . . .